Module 3 Unit 5 - Working with Text Data#
Qualitative data can be a rich source of insight for those who know how to work with it.
In this unit, we’ll focus on textual data rather than images, audio, or other qualitative data formats.
Specifically, we’ll explore some tools that can:
Translate data from one language to another
Check for spelling errors
Convert text to speech
Analyse natural language
Some of the examples in this unit use the pets DataFrame from earlier in the course. If you need to recreate it, run the following code in your Jupyter notebook.
from pandas import DataFrame, read_csv
url = "https://tinyurl.com/y917axtz-pets"
pets = read_csv(url)
pets.head()
The result should look like this:

First five rows of a DataFrame containing data on pet adoption. DataFrame contains eight columns with information about each pet: ‘Name’, ‘Species’, ‘Gender’, ‘Age’ (in years), ‘Fixed’, ‘Legs’, ‘Weight’ (in lbs), and ‘Time to Adoption’ (in weeks). Each row corresponds to one pet, and the rows contain complete information for each of the columns.
Adding new analysis tools#
Most of the tools we’ll look at are accessed the same way.
First, we find the toolkit online and install it on our system using a !pip install command.
Then we import the functions we need from the library included in the toolkit, just like we do with pandas.
Let’s try that now!
This section contains tutorials! Get the most out of them by opening a Jupyter notebook in another window and following along. Code snippets provided in the course can be pasted directly into your Jupyter notebook. Review Module 2, Unit 5 for a refresher on creating and opening Jupyter notebooks in Callysto.
🏁 Tutuorial: Adding Google Translate to a Jupyter notebook#
Step 1
Run this code in your Jupyter notebook to install the Google Translate software package.
!pip install googletrans
The package usually takes a few moments to install, so we might not see a result immediately.
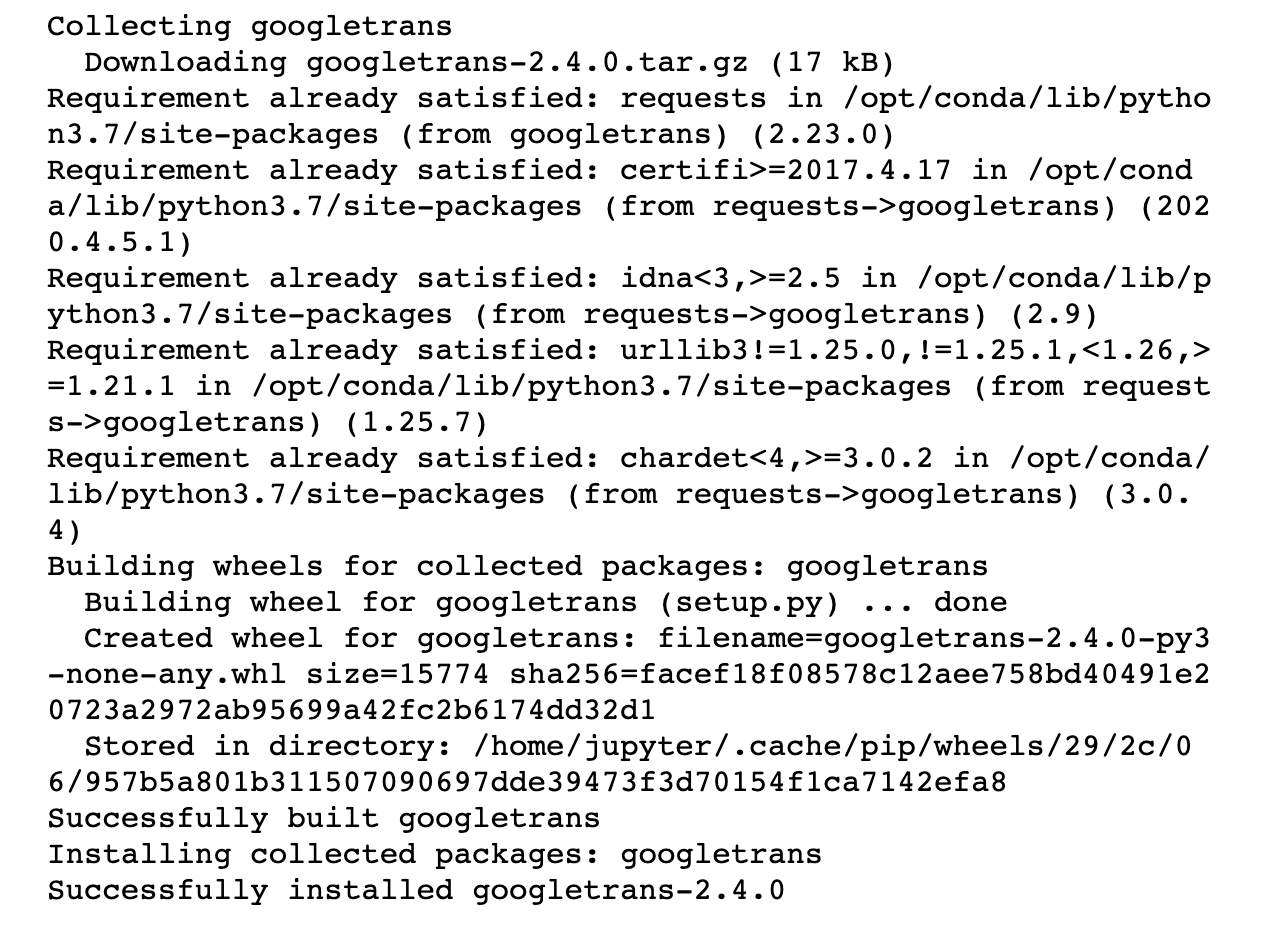
However if the install is successful, we should see a message similar to this a few moments later:

*Demonstration of what it looks like when we install the ‘googletrends’ python library. Running !pip install googletrans will generate a message informing where we are in the installation process. A successful installation will finish with the message “Successfully installed “ followed by the library name and version. In this case “Successfully installed googletrans-2.4.0” *
Step 2
Now that the software is installed, we can import functions from the googletrans library.
For now, we will just import one important item, the Translator.
Run the code below.
from googletrans import Translator
translator = Translator()
The first line above imports the Translator function, and the second line creates an engine that will do the translation for us.
Step 3
Our translation engine should now be ready! Run the code below to test it.
translator.translate('bonjour').text
This command should detect that the word bonjour is French and translate it to the same word in English.
The output should look like this:

Demonstration of translating ‘bonjour’ into English using the translator function. We use the following notation to translate into English: translator.translate(‘bonjour’).text
🏁 Key Term: Google Translate#
Google Translate is a tool used to convert text information from one language to another, using the Google Translate API. More information about this tool is available from the Python Package Index (PyPi), an online repository for Python software packages.
🏁 Key Term: Engine#
By engine we mean a piece of code we install that we will use to run the translations for us.
Google Translate#
Google Translate is a sophisticated tool that can recognize many languages.
For example, here’s a command to translate a short Korean phrase.

Demonstration of translating Korean “Good evening” into English using the translator function. We use the following notation to translate into English: translator.translate(‘안녕하세요.’).text
In many cases, Google Translate can figure out the source language on its own, however we can also specify source and destination (output) languages:
translator.translate('castor',src='fr',dest='en').text

Demonstration of translating a word into a selected language. Using the translator.translate(input word, scr=input language, dest=output language).text function with parameters input word ‘castor’, input language ‘fr’ (French), output language (‘en’) English translates ‘castor’ from French into English ‘beaver’.
Our translation engine can be applied to entire columns of data in a DataFrame.
For example, we can translate all the entries in the Species column of our pets DataFrame from English to French.
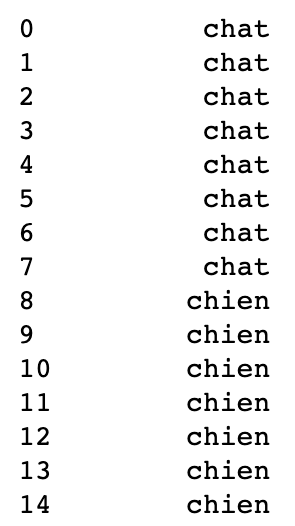
pets['Species'].map(lambda x: translator.translate(x,dest='fr').text)
This command uses a lambda function to take a string (x) and run it through the translation engine.

Demonstration of translating words in a data frame column into French language using the Pets dataset “Species” column. Output is a list with column values that are indexed. Rows with index 0 - 7 contain the word ‘chat’ which is the french translation for ‘cat’, while rows with index 8 - 14 contain the word ‘chien’ the french translation for “dog”.
🏁 Activity#
Can you translate the design names in the coin_df DataFrame into French? How about German, or Japanese?
If you need to re-create the coin_df DataFrame, use the code below.
from pandas import DataFrame
data = {'name': ['penny', 'nickel', 'dime', 'quarter'],
 'value': [1, 5, 10, 25],
 'weight': [2.35, 3.95, 1.75, 4.4],
 'design': ['Maple Leaves', 'Beaver', 'Schooner', 'Caribou'] }
DataFrame( data )
Pyspellchecker#
The pyspellchecker tool allows us to correct the spelling of words in data sets.
Just like we did with Google Translate, we first need to install the toolkit into our Callysto Hub.
!pip install pyspellchecker
Once we have received a notification that the package has been successfully installed, we can import the function we need.
from spellchecker import SpellChecker
spell = SpellChecker()
The first line above imports the SpellChecker, and the second line creates an engine that will do the checking for us.
Try testing it out with a common misspelling.
spell.correction("neccesary")

Demonstration of using the correction() function from Python’s spellchecker library. To check spelling of a word, import Spellchecker: from spellchecker import SpellChecker and define spell = SpellChecker(). Then call correction as follows: spell.correction(‘necessary’).
Just like with our translation engine, the spell checker can be applied to an entire column in a DataFrame with the help of a lambda function.
Let’s see what happens when we run the spell checker on the names column in our pets DataFrame.
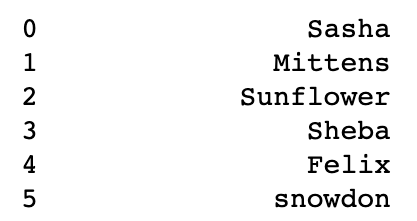
pets['Name'].map(lambda x: spell.correction(x))

Demonstration of spell checking words in a data frame column using the correction function using the Pets dataset “Names” column. Output is a list with column values that is indexed. Each row contains a name, ordered as follows: Sasha, Mittena, Sunflower, Sheba, Felix, snowdon.
We can see that the spell checker has output the names column with all the strings it detected as having a spelling error with a “corrected” substitution.
In this case, we can easily see which names have been left alone and which have been changed because the spell checker doesn’t capitalize the first letter.
For instance, we see that the spell checker has “corrected” the name Snowcone to come up with snowdon (which Snowcone’s owner might not be thrilled about).
While this tool isn’t super useful when applied to a list of names, it’s excellent for large data sets that have a lot of descriptions and labels.
Errors in these values can have a big impact on the quality of our analysis, so being able to run a correction tool can go a long way.
The pyspellchecker library is simple but powerful, and it’s worthwhile to learn more about it.
📚 Read#
Pure Python Spell Checking is the project documentation for the pyspellchecker toolkit.
Text to Speech#
Python toolkits for transforming textual information into speech (TTS) can be helpful when communicating with audiences who have difficulty with visual formats, including people with vision disabilities, language barriers, and literacy challenges.
gTTS (Google Text-to-Speech) is a Python library and tool that allows us to access the Google Translate text-to-speech API.
🎥 Watch#
What is gTTS? How to implement text-to-speech in python using gTTS? This short video demonstrates how to use gTTS and a basic program to convert text to speech and save it in .mp3 file.
from IPython.display import YouTubeVideo
YouTubeVideo('v=eiP-12qHM-c')
We can install gTTS to our Callysto hub the same way we did with the last two tools:
Use the !pip command to install the package
Use the import command to make the tool available in our Jupyter notebook
Test the tool.
Try running the code below to complete these steps.
!pip install gTTS
from gtts import gTTS
tts = gTTS( 'Hello, world' )
tts.save('hello.mp3')
If the code is run successfully, we should be able to find a new mp3 audio file in the Files tab of our Callysto hub named Hello.mp3.
Explore (Optional)#
[Play sound in Python](Play sound in Python)
Audio files can be played right in a Jupyter notebook using a variety of Python modules.
Natural Language Processing#
Natural language processing tools are helpful for analyzing large amounts of text in basic ways.
For example, there are tools for detecting if a segment of text is a complete sentence, if it contains nouns or verbs, and the tone of the text (positive or negative, formal or informal, etc.).
Tools such as those in this Natural Language Toolkit (NLTK) are powerful enough to analyze entire books, and can be great when working with large data sets.
Natural language process tools are a little more complex. We won’t explore them in detail in this course, however, an interesting example of how they can be used in a language arts context is provided in a Jupyter notebook below.
Explore#
English Language Arts 10-12: Shakespeare and Statistics is an interesting demonstration from Callysto of how natural language processing tools can be applied to analyze works by Shakespeare in a Jupyter notebook.
Conclusion#
In this module, we learned about different kinds of data structures such as the pandas DataFrame structure. We also explored how to bring data sets into a Jupyter notebook and how to organize them, and used tools that let us work with numerical and textual data.
In the next two modules, we will use DataFrames to create illuminating visuals such as graphs, charts, and interactive maps.
References#
Python for Data Analysis. Wes McKinney. O’Reilly Media. 2017.
Online Docs:

